MyOldDesignjet.com
  • Home
  • I Save Designjets!
  • INK
  • Cables
  • The Plotter Princess Blog
  • Ask the Plotter Princess
  • Pay / Donate
  • Drivers
  • Files
  • Screaming Cat?
  • Designjet Manuals
  • Reviews
  • Get UP After A Fall
  • Shower Chair
​As an Amazon Associate I earn from qualifying purchases.

Surge Protectors, Electrical Outlets and Leaving the Designjet ON!

9/14/2014

0 Comments

 
Picture
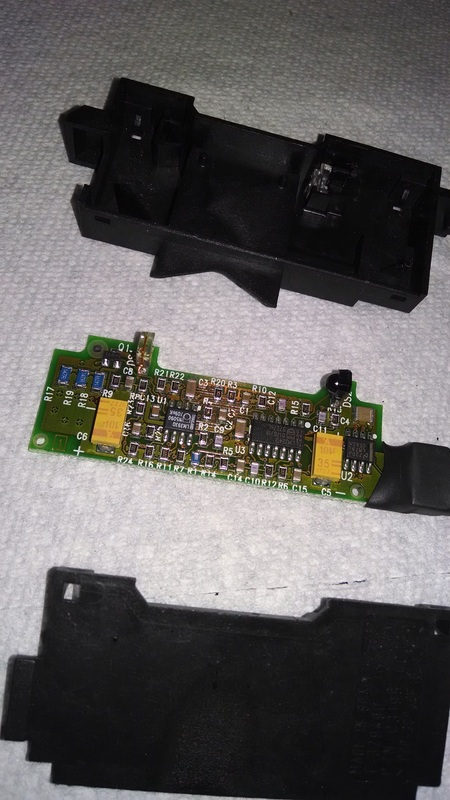
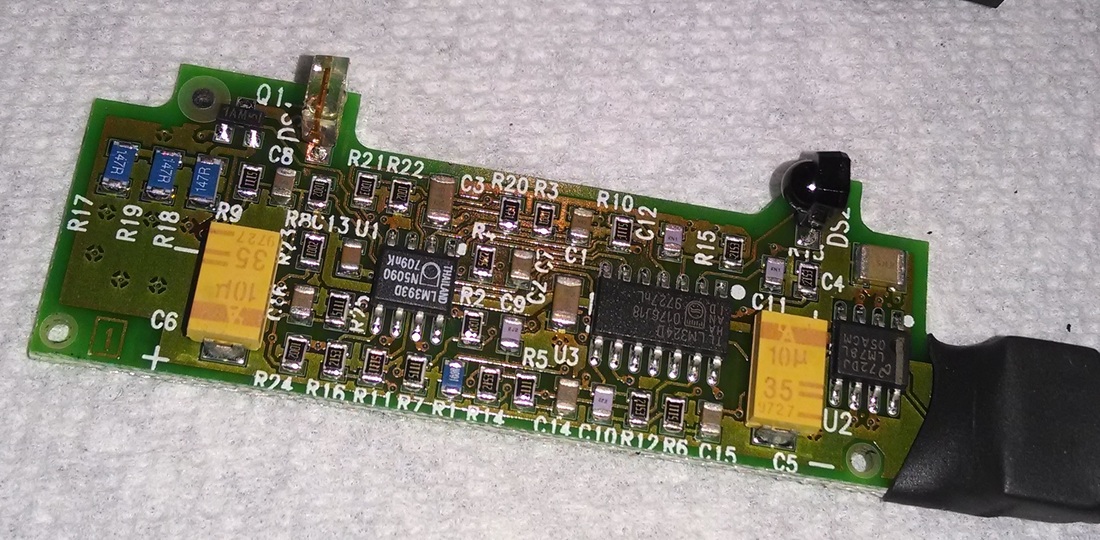
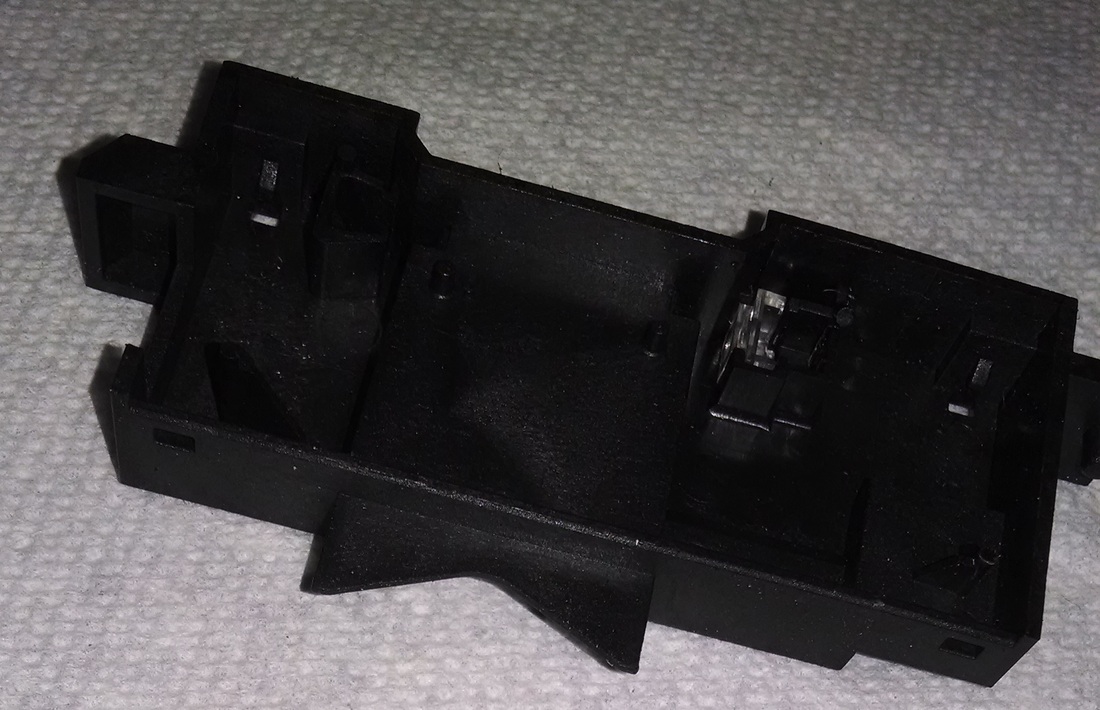
I had an interesting customer this week. He had purchased a 755cm HP Designjet from me a couple years ago. He's only called me twice needing help with the machine. He called two days ago saying that the LCD lights on his front panel no longer worked after he moved the plotter from a commercial space to his home. It was fine before the move but died when they first plugged it in at the new spot. "We only moved it three miles and we kept it vertical and it didn't get dropped."

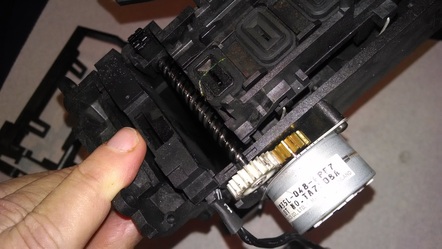
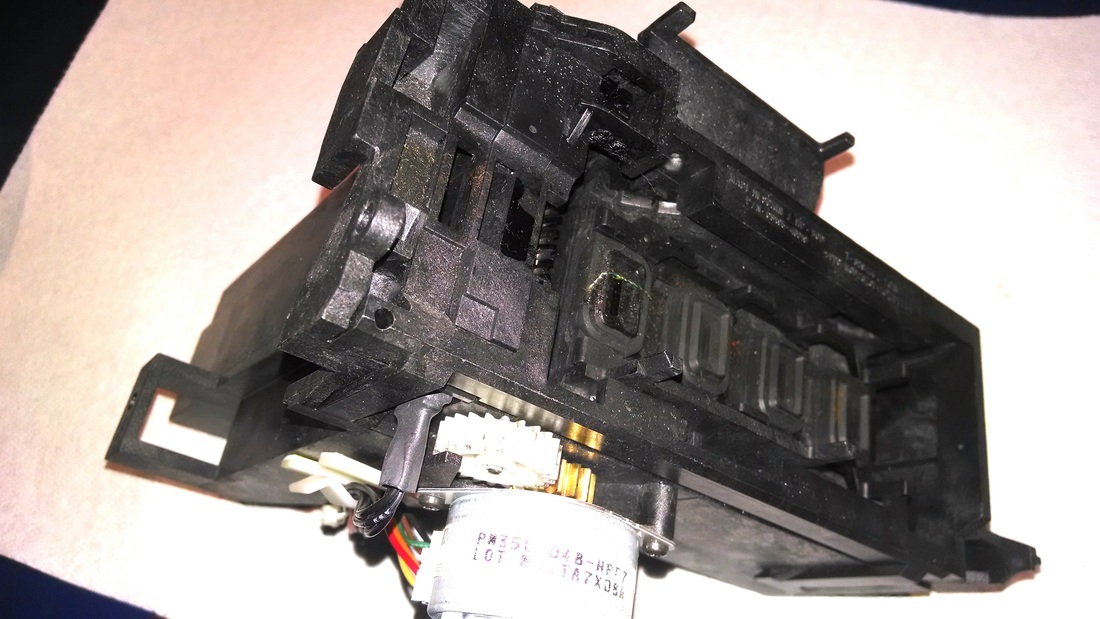
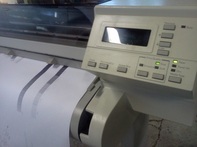
I said he should bring it by my workshop and I'd pop another front panel into the machine. He did. I did. It worked great. We were both quite pleased. I reminded him that plotters should always be plugged into a true surge protector and then they should be left on...as they really don't suck much power and turning them on and off is actually harder on the old electronics than just leaving them on.

An hour later he called to say he'd gotten it home, plugged it in and there was even a little spark as he plugged it directly into the wall outlet...he'd buy a surge protector tomorrow...

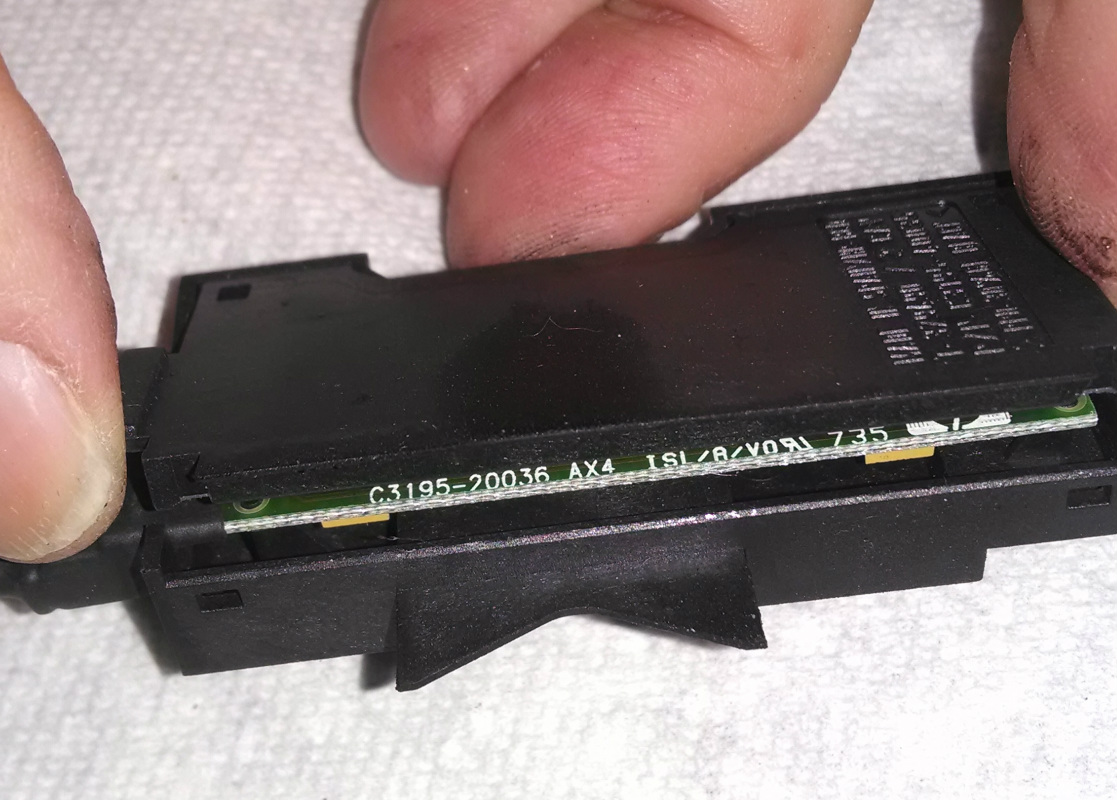
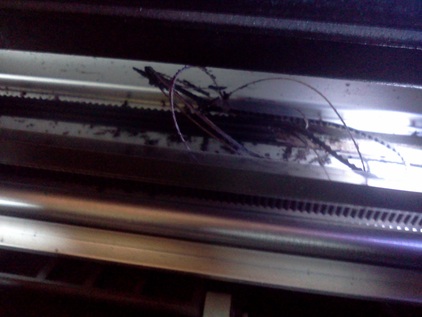
You might have seen this one coming. He burned up the replaced front panel. Obviously he has some electrical problem with that outlet. A surge protector would have saved him time and money -- a lot of each. He assured me that he'd always left his plotter on since he bought it from me, but the surge protector message had been missed. 

Lucky for him, I have one more panel I can sell to him.

0 Comments

Drop Detector Errors and Pen Checking - See the photos!

12/29/2013

1 Comment

 
Picture
HP Designjets drop detectors are sensors that look at the drops coming out of each cartridge and pass or fail that cartridge. In the photo at the left my finger is pointing to the drop detector of a 750c.  There's only one problem with most of these old drop detectors...they get covered in gooey ink and no longer work. You have 3 choices when you start getting errors related to drop detectors:
1. Set PEN CHECKING (via your menu, usually under Device/Plotter Set Up) to OFF. You don't need it, you know if your cartridges are working better than the 1997 drop detector does!
2. Remove and try to clean the drop detector...be warned there is a small circuit board hidden in the drop detector's black plastic casing so you can't just flush it with running water. But you can open the casing with a small flat knife via the plastic seam. Once open you can pull  the circuit board out and wipe down the sensors and rinse the black plastic casing to get all the old ink out. (See below for photos relating to this procedure.)
3. Replace the drop detector by buying a new or used one online...
NOTE: Both cleaning and replacing the drop detector require that you re-calibrate the drop detector...look it up in your service manual. If you can't find it, contact me and I'll help.

Picture
The service station from a 750c.
Picture
Undo the four tiny screws on the top edge and remove the retangular black "frame" that hold the service station together.
Picture
Here's the drop detector. Lift it out...there was nothing but the frame holding it in place.
Picture
Slide a flat blade into the plastic box seam of the drop detector to force the two pieces apart.
Picture
See the drop detector circuit board? Now lift the cover off and then take out the circuit board...
Picture
The 3 pieces that make up the drop detector.
Picture
Circuit board with the round "eye" on the top right that needs to be cleaned off with a cotton tip and some alcohol...and the other piece that looks like a tiny lens (left upper) that also needs to be cleaned off.
Picture
The left side of the sensor goes into the clear plastic front box on this plastic housing (right side).
1 Comment

Solution to Jagged Lines on 430 HP Designjet

10/21/2013

0 Comments

 
Picture
Aaron in Phoenix reports that the BLACK CARTRIDGE ALIGNMENT SHEET procedure outlined in the 430 / 450c User Manual in Chapter 5 was the solution to his problem with jagged lines as seen in the photos in a previous post and the after plot seen on the left. 

Picture
Picture
0 Comments

430 Designjet has jogging lines - Can you help?

10/19/2013

2 Comments

 
Picture
Aaron in Phoenix is looking for an answer to his 430 Designjet line jogging...I thought it might be the encoder, he replaced the encoder and the print isn't looking any better. He's also recalibrated with the print quality re-cal. Now he's getting desperate and I'm feeling like Aaron has stumped the Plotter Princess so I asked him if I could put it out there for the rest of you to help us. If you have experience and have resolved this, please leave a "comment" at the bottom of this posting. Thanks!!
Picture

2 Comments

More from Brad from Down Under! How to remove the carriage without removing the end caps!

8/23/2013

0 Comments

 
Picture
(Readers - Brad from Perth is a fellow classic plotter enthusiast and has written a second guest blog for us...Thanks Brad!)

I have a couple more tips you might not have stumbled across.
My favourite is removal of the carriage with it remaining in the centre of the printer.

On each side of the carriage, the two slider bushes are retained by a screw and flat washer. If you remove these, you can pop your finger under the carriage and slide the bushes out (sometimes they take quite a bit of force, but you can't damage anything with finger force).
Once those are out you can work the front of the carriage up and away from the front slider rod. Then it is a matter of gently sliding it forward and off the bush on the rear. Now, the spring that tensions that rear bush has a hair trigger, and will fly quite some distance if you don't get your hand on it before sliding the carriage off.

The bushes are indexed and so can't be assembled incorrectly. I like to give the fine lubricant slots in the bush faces a real good clean, as they seem to gum up badly depending on which lubricant people use.

Assembly is reverse of removal. This way you don't have to remove the slider end caps or disturb the trailing cables (I ruined my first set as the glue holding the cable ends together had disintegrated and so they fell to bits as soon as I pulled them from the contacts).

I've also found that as the trailing cables age, they can de-laminate around where they curl into the contacts on the carriage, and also the bend that forms where they loop out in the printer. They seem very touchy to any form of movement they are not routinely subjected to (like, oh.. say slipping with a screwdriver and belting them with the palm of your fist).

Speaking of lubricant, I'm one of those sticklers for the right stuff. So I have a bottle of 6040-0855 HP synthetic lubricant that I use. It wasn't expensive, and I figure they went to the trouble of making a specific lube, so I might as well use it. At the rate I go through it I figure the bottle will last me 100 years. I also have a syringe of the right white grease for the X-axis gears, but the part number has long gone from that. It's the same stuff I use in the gears of all my laserjets, and is another HP specific goo. Again, it'll outlast me I'm sure. It turns out the synthetic lube (which is water clear when you buy it) slowly yellows with exposure to UV, so keep it in the dark (like ink). My first refill was with ink that had been sitting on my shelf for a year, and I was amazed by how much it faded in the bottle with exposure to UV. I had to drain and refill the carts with new stuff or else all my prints looked like they'd been pegged to the clothes line outside for a year.

Sometimes I've had trouble with recognition of one of the cartridges, ultimately ending in the printer becoming a monochrome model. Upon dissasembly of the carriage, I put the flexible ribbon for the cart contacts under a powerful magnifying glass and spotted where one of the contacts for the offending cartridge had a break right where the copper track joined the gold contact lump. Rather than spring for a re-furbed carriage, there are a couple of e-bay stores in China that stock replacement ribbons for less than half the price of a replacement carriage.

I always give these a good going over anyway as I completely disassemble the carriage for cleaning, but it turns out they are not very difficult to replace.

I like your spot on the DJ500. I worked in an office for years that had an 800ps, and if I could fit it in, I'd get one. Unfortunately I need the 36" wide carriage, but the hole in my office is only just big enough for the 750, so a 42" 800 would be out of the question. Just way too wide.

I've not done a great deal of research on those units, but I certainly enjoy working on the 700's, and even at 300dpi, on coated paper with good ink they do a credible job for images, and a terrific job for CAD (which is their main use here).

Ink is another one. I've taken up re-filling my own carts, and saved a fortune. I pick up new (expired) carts on e-bay when I get the chance, as I find a good refill may only last 3 or 4 fills before the image quality falls off as the print head degrades, and they are only suitable for CAD.

I keep about 3 full sets of carts, a acceptable, good, & best set that I swap between when I want to make something really shine.

I find that the silicone wipers in the service station tend to scratch the print heads if they are allowed to get too dirty. When I refill a cart I have a good look at the head under strong magnification, and that determines which pile it gets assigned to.

One of these 750's lives at my Parents house for Dad to use, so I keep some sets of carts for them also.

I find that by re-filling them myself, I can keep the little green ink level indicator working, and by making sure that they are swapped out when it goes black, rather than when they fail a cartridge check, I don't tend to burn out nozzles, and the carts last more refills.

I have it down now that I can do a set of 4 in about 15 minutes, but if I'm doing a batch I can probably do 3 full sets in half an hour. I do my wifes Officejet 6500a also. It's supposed to use different inks, but it does very well with the same stuff I put in the designjets.

You guys are lucky in that the best ink and accessories all come from the States. Costs me a bomb in postage (relatively), but it's still miles and away cheaper than even expired carts.

If it's of interest, I can detail some of the do's and don'ts I've learned about refilling too.

0 Comments

Brad from Down Under shares his HP plotter tips and tricks! 

8/23/2013

0 Comments

 
PictureService Station on the 750C (see item F in the blog.)
(Dear readers - this week I received a lovely correspondence from Brad who is, like many of us, a committed HP Designjet lover and saver! I asked Brad for permission to share his comments and he graciously said yes.)

I, like you, have a little menagerie of Designjets. In the process of buying them, re-building them and using them I've come across a couple of tips that I wondered if you might find useful.

A) On a number of machines the belt tensioner is thoroughly shagged out. A bit of research showed that the bearing is a standard R4ZZ (basically a roller skate bearing) and a made in Japan version is available for less than $10 from any bearing supplier. It can be pressed out and a new one pressed in with the aid of a bench vise and some generic 3/8" drive sockets (used as mandrells). I now do these as a matter of course when I refurb a machine.

B) I was getting increasingly frustrated with the rapidly fading VFD displays on my 750's, so I reverse engineered the display protocol and made a new display using a blue LCD. It will never fade, although in its current incarnation needs to be glued in with silicone. I need to make a couple more, so I'll try and neaten it up a bit for the next set.

C) I got sick of the Ortho wiper blade falling off, but I had to try about 7 different adhesives until I found one that worked properly. Turns out standard Cyanoacrylate (super glue) does the job the best. I'm going to have a crack at building, moulding or fabricating new Ortho wiper blades as I just can't secure second hand ones anywhere. (Parts are significantly more difficult to come by in Australia)

D) The three plastic posts that secure each end cap on the printer often fracture where the screws pull on the ends. A slice off a 14mm PVC conduit adapter makes a perfect outer ring to slide over those, and secured with some Devcon plastic welder, makes a perfect and long lasting repair.

E) The o-ring that seals the base of the primer assembly appears to crack and leak with age. A smear of neutral-curing clear silicone bathroom sealant on that seals it up tight on re-assembly.

F) The drop sensor board grows a furry corrosion and progressively loses sensitivity over the years. A scrub with a toothbrush and some isopropyl alcohol, and then a light spray of PCB conformal coating (put tube over the light sensors to prevent sealant getting on them!) will ensure that never happens again.

G) Generic replacement trailing cables are *hard* to get right as they don't have the longitudinal curve the genuine HP cables do. Instead, I developed a technique for replacing the belt and re-building the carriage without having to remove the rail end caps, and without having to disconnect or disturb the trailing cable.

I also dismantle, clean and re-grease the X-axis assembly, remove and dismantle the primer, service station, spitoon and carriage. Soak all non-electronic parts in water and clean away all remnants of ink, and then re-assemble everything. I'm constantly amazed at the amount of ink that gets into the carriage assembly around the cartridges.

As you can probably tell, I'm passionate about my old technology. I'm lucky having a wife that understands. (She even understands my similar dedication to old Volvos).

I have been contemplating starting a blog to document this stuff, but then I accidentally stumbled across yours and thought perhaps I could feed you information instead. Anything you are not already across could contribute to the available wisdom.

Regards,
Brad

0 Comments

Lift Lever to Align Paper...

8/15/2013

0 Comments

 
Here's a great video that shows you how to load a roll of paper and then "align" the paper. 
YOUTUBE VIDEO
The alignment is to make sure the paper is square in the plotter...and the sensors will check when you are done aligning to make sure you did it right, if you didn't it will keep kicking the out the paper load. The only other thing that can affect this is the edge detection from the same sensor...if you get an edge detection error, the light that shines red or green on the black rubber roller is probably dirty and you can reach under and clean it with a cotton swab soaked in rubbing alcohol...do this while the machine is turned off.
0 Comments

220, 430 - 450c Designjet Setup Sheets - The forgotten solution!

8/15/2013

0 Comments

 
From the manual -- how to use the SETUP function on the 488ca, 430 or 450c. What it doesn't mention is that you use a 8.5 by 11 inch -- letter size -- paper to print the setup sheet. With the setup sheet you can change the ink drying time, the color settings to monochrome, and many other things!
Picture
0 Comments

Mark Encoder on Your Designjet - What is it and how to fix it!

7/3/2013

0 Comments

 
HP explains the Mark Encoder How to find it and fix it! Click here to read it...: 
0 Comments

Does the belt on your plotter need to be replaced?

6/18/2013

0 Comments

 
PictureA blown carriage belt can ruin your day and turn your plotter into a giant boat anchor!
I explain this to many callers every day...with the 400 and 700 series Designjet the original carriage belts are just at the age where the rubber is sure  to break down in the near future. Just like hoses and belts on classic cars, they must be replaced. There is one sure way to know if you are looking at buying an older HP Designjet: Look for little black fragments on the silver floor under the belt. It may look like a mouse has been in there...or it may just have a fine black dust. If you have black dust, you probably still have a number of plots you can run...if you have black chunks, don't expect to finish a plot without having your carriage belt blow up, ok?

Picture
If the floor under the belt looks like this you'll be needing a new belt very soon!
0 Comments

Time to Oil and Align Media Light Error on 450C or 430 

6/2/2013

0 Comments

 
All Designjets need occasional lubricating...if you can't remember when the last time was that you "oiled" the rail...well, it is time to do it again. Turn the machine off, place 3 drops of oil on the front and back slider rail, then move the carriage all the way up and down the rail 2 or 3 times.

Special Note for 450C and 430's: 
If after loading a roll of paper and printing a print, the ALIGN MEDIA light comes on and won't quit...but your media really doesn't need aligning, it is probably time to put a couple drops of lubricating oil on the silver rail that the carriage rides on. I've seen this error twice recently. It is often caused by increased resistance as the carriage rides left to right...these machines are very sensitive to the rails getting dry and causing some drag...it is easy and cheap...give it a try. You can use any "tri-flow" type of oil or plain old mineral oil.


0 Comments

 When your Designjet 600 displays in Chinese instead of English...

3/1/2013

0 Comments

 
Picture
Today I was on the phone helping a customer work through an error code - they were going to try a couple more tricks to try and get the machine to behave...Sounds like they had a paper crash and then the machine started displaying one errTor code after another...They said they'd call back if my directions didn't work.

30 minutes later the phone rings again and the voice says..."Now everything is displaying in Chinese and I can't figure out how to get back to English." I said, "go to Utilities and find Languages..." -- The customer said, "How will I do that, as I can't read the Chinese looking characters on my LED panel."

Lucky for them I had another plotter just like theirs in my inventory (an HP Designjet 600) and I turned it on and worked through my English menu to figure out the right number of ENTER, UP, DOWN for them to find their English again! Here's the directions in case it happens that your Designjet 600 suddenly displays in Chinese:
If the machine and carriage has parked in the left side
1. Press PREVIOUS 6 times -- (You won't see a change on the screen this is just to clear the menu.)
2. Press ENTER (You won't see a change)
3. Press DOWN 3 times
4. Press ENTER
5. Press DOWN 2 times
6. Press ENTER
7. Press DOWN 2 times -- now you should see the word "ENGLISH"
8. Press ENTER (to choose ENGLISH)
Now you should see in English:
UTILITIES
Language=English
Press UP
Press PREVIOUS 2 times

Now it should run in English...Whew...


0 Comments

My Favorite Problem Solving Site

2/5/2013

0 Comments

 
Picture
Tonight I'm working on a Designjet 650C that I picked up from a very nice man who'd let the machine sit for a long time without use and apparently without covering it. If you have a plotter that is going unused for a long time and your environment is dusty, pull the cartridges and put them in a plastic bag AND cover the plotter. These old babies are work horses, but really they deserve a little extra care!

And while I was busy trying to recalibrate the bail that wasn't properly behaving, I found this site and was reminded how good they are. It appears that this site somehow got the info from HP that was set up for their HP Designjet technicians. This site has save my sorry butt many times throughout the years...so I'm giving them the official Katrinka Finkelstein Best Troubleshooting Site Award.

0 Comments

Stalled Print Jobs: How to Empty the Queue

10/13/2012

0 Comments

 
I'm often called with questions about print jobs that have become stalled in the print queue and won't let anything through.  This can ruin your day! This appears to be a flaw in some drivers and there's only one way to resolve it when it happens...you need to find the jobs and KILL them. You can press CANCEL in the print queue all you want and nothing happens...that's when you know you need to follow the steps below to fix this.

1.  Make sure all  print jobs are complete and that no new print jobs are being submitted. 
2. Double-click  SERVICES in the PRINT CONTROL PANEL and stop the “Print Spooler” service. 
3. Open the  C:WINDOWSSYSTEM32SPOOLPRINTERS in My Computer. 
4. Delete all  files located in this folder. Files in the Printers are named xxxx.spl, xxxx.shd  where xxxx is a hexadecimal number. Files with .shd and .spl extensions are printer files. Double-click Services in the Control Panel and start the “Print Spooler” services. 
5. Re-print any  print jobs AFTER you have determined what caused the stall: Was the job too big for your plotter's memory? If the failed plot was a PDF, try FLATTENING the file. (See my blog posting about flattening PDF's.)
0 Comments

When Your Plotter Doesn't Work

9/12/2012

0 Comments

 
Picture


  • Turn off the plotter.

  • Unplug the plotter for at least 5 minutes.

  • Move the carriage to its home place(where it goes to sit when the plotting is over) – usually on the left.

  • Plug it in again and turn it on.

  • If it begins initialization and stops with an error message, note where in the sequence it stopped.

  • If the error message indicated “check pathway” it means the carriage is sensing some extra resistance or there is something blocking the red light sensor on the side of the carriage. Check for old pieces of paper under the carriage...if nothing, try putting 3 drops of baby oil or mineral oil on the silver carriage rail...

  • Turn it off and turn it back on again.

  • If error message shows after the initialization is complete, press CANCEL to see if it will clear.

  • Read the manual's troubleshooting or error message section to figure out what the machine is trying to tell you. I know it is a drastic and unusual move, but HP published these for a reason! You can usually find the manual online, but if you can't, contact me and I'll try to find it for you.
  • If the error message has to do with the “encoder” use a lint free piece of cotton cloth wet with rubbing alcohol to do a very gentle wipe of the silver aluminum coated strip...called the encoder strip...and let it air drive. DON'T rub or the coating will come off and the plotter will not work again until you replace it!

0 Comments

Tips for Setting Up Your Plotter

9/12/2012

0 Comments

 
Picture
Start Up

  • Always plug into a surge protector outlet...this is good insurance and will save your plotter from a motherboard being fried by a power surge.

  • They “initialize” when you first turn them on. This means they run through about 15 self tests.

  • Try not to interrupt the plotter while it is initializing.

Paper (Media)

  • Never try to load media unless the plotter indicates that it is ready for media.

  • Roll paper always goes OVER the top of the roll...like toilet paper!

  • A 36” wide machine CAN use a 24” roll...and all Designjets can use legal and standard size sheets of paper, too.

  • Media must be straight when you push the load button...if it skews a little the plotter will sense it and spit the paper back at you. If you have the type of machine that grabs it from you when you insert it, LET GO the moment you feel it grab the paper...or you will make it skew.

  • Most Designjets have a perforated or printed line on the right side of the place where you enter the paper into the machine, try to line up the right side of the paper near, but not past that line.

  • If you are feeding separate sheets into the plotter and it keeps skewing, you may have paper that has too high a cotton content...try HP plain paper and see if that fixes the problem.

    Ink Cartridges:

  • Some color machines don't care if the color cartridges are empty, they just need a cartridge in the slot. If colors are empty, it will still print in monochrome.

  • Old cartridges can be revived sometimes by running the print head under hot water, then placing the cartridge on a wet paper towel to “wick” the ink out and clean out those 20 little ink jet holes on the print head. Leave it sit for at least 1 hour. Then take the cartridges outside and do a “whip cracking” shake --- holding it upright do a quick downward motion and a sudden stop, like you are cracking a whip...it should now have two small lines of ink on the print head. If not, repeat. If still not, the heads might be clogged, shake it a few more times, run under hot water again, try the wet paper towel soak again. If you still can't get ink to move, it is probably a bad cartridge that you won't be able to save.

  • If a plotter continues to reject a cartridge that does produce ink (see above), turn off the machine, take a damp paper towel and wipe out the inside of the cartridge holder.

  • Buy hard to find ink on eBay or Amazon.com to find the best deals...however, open the ink the moment you get it to be sure it hasn't bled out of the printhead...there will be ink all over the tape on the printhead when you open it and this means the cartridge can't be saved.

  • If you can find a professional refiller to fill you empty cartridges, try it...if they guarantee their work.

General

  • Leave your plotter turned on. Don't turn it off at the end of everyday. But DO plug it into a surge protector, or a storm could eat your plotter!

  • If your plotter doesn't have enough memory it will print out 75% of the plot on the right side of the paper and the last 25% will be missing on the left. To resolve this, choose ADVANCED on your print driver and check the box that allows the computer to handle the memory for the plot.

    • You can also add memory – check the manual to see how much you can add.

    • If you are printing PDF's, try converting them to TIFFs as they are much smaller files.

    • Read your manual section on QUEUE and NESTING to figure out how best to manage large files.

  • Keep the window on the plotter closed and even cover the machine if your office/work area is dusty.

  • NEVER, when transporting, lay a plotter down...there is a spittoon with old ink that will spill over the interior of the machine AND there will be wet ink everywhere!

  • You can connect your plotter to the USB port on your computer with USB to parallel printer cable. When adding the printer, be sure to NOT use the default LPT port, but instead choose the USB port offered on the dropdown menu.

  • Most plotters on stands can be removed from the stands and sit nicely on a shelf or table if floorspace is scarce in your office.

  • Most plotters have a UTILITIES section on the control panel there find the FACTORY RESET to return your plotter to what it originally was set-up to do. This is a good trick, because sometimes you may have inadvertently commanded the plotter to do something that creates conflicts.

  • If you see small black “mouse turds” under the rubber carriage belt, it is starting to break down and can die at any point. Replace it ASAP....


0 Comments
Forward>>


    Buy designjet Ink & supplies here!

    ___

    Call Me
    651*247*3022

    __

    ​If I helped you to solve your problem and/or helped you save a few dollars, you may wish to donate a dollar or two to help keep this service available.
    ​
    Donate Now

    Categories

    All
    Buying
    CAD
    Designjet 430
    Designjet 450
    Designjet 500
    Designjet 600 / 650
    Designjet 800
    Drivers
    Etc)
    History
    Ink Cartridges
    Ink Cartridges
    Installing
    Media (Paper
    Misc
    Network
    PDF's
    Ports
    Princess Picks
    Printing
    Troubleshooting
    Win 10
    Win 8

    # 40 Refilled Ink
    # 40 Refilled Ink
    5188-6700, C3190-60095,       C4705-60082, C1633-40082 C2990A, C2991A 5063-1257 C2951A, 5063-1256,       C2913A, 17302A, 31391A C4713-60181, C4713-60182,      C3180-60012, A6144-63008,    C4699-60082, 51644CA,       51644CE, 51644CL,       51640A, 51644C, 51644M,       51644Y, 51640AA,     51640AE. 51640AL,     51644MA,51644ME,     51644ML,51644YA,51644YE 51644YL, C4713-40038,     C4699-40003,C4699-40004,   C4699-00015,C3190-60082,     C4699-40005,C3192-60001,     C4699-60078,C3174-40011,     C3876A, C3886A,51642A,     C4696-60006,C3190-40029,     C4704-60095,C3190-40041,     C3190-40052,J3258-61041,     J2591-69001, J2594-69001,     J3258B, J2591A, J4102B,     J2590A, J4101B, J3264A,       J3265G, C3190-40045,       C3178-00030, C4705-00017,     C4696-60007, C6074-60460,     6040-0858, C3146-67901,       C4699-60074, C4699-69039,     J3265-69001, J2382-69003,     J4102-69022, J2592-69001,     J2590-69001, C4699-60064,     C3190-60145, C4699-00008,     C4699-60020, C4699-60011,     C4699-60015,C4699-60014,     C4699-60017,C4699-60018,     C4699-60012,C4699-60019,     C4699-60016,C4699-60013,     C4699-60081,5188-5676,       0957-2340,0950-2623,       C4699-60003, C3190-60132,     5183-5268,5184-2833,     C3190-60096, C4699-60042,     C3174-60013,C3190-60140,     C3190-60142,C4713-60123,     C6072-60286,C3174-60005,     C4699-60002,C3190-80010,     C1633-80005,C3192A,       C4713-60098

Contact the princess at
​651-247-3022

Photo from Frank Boston